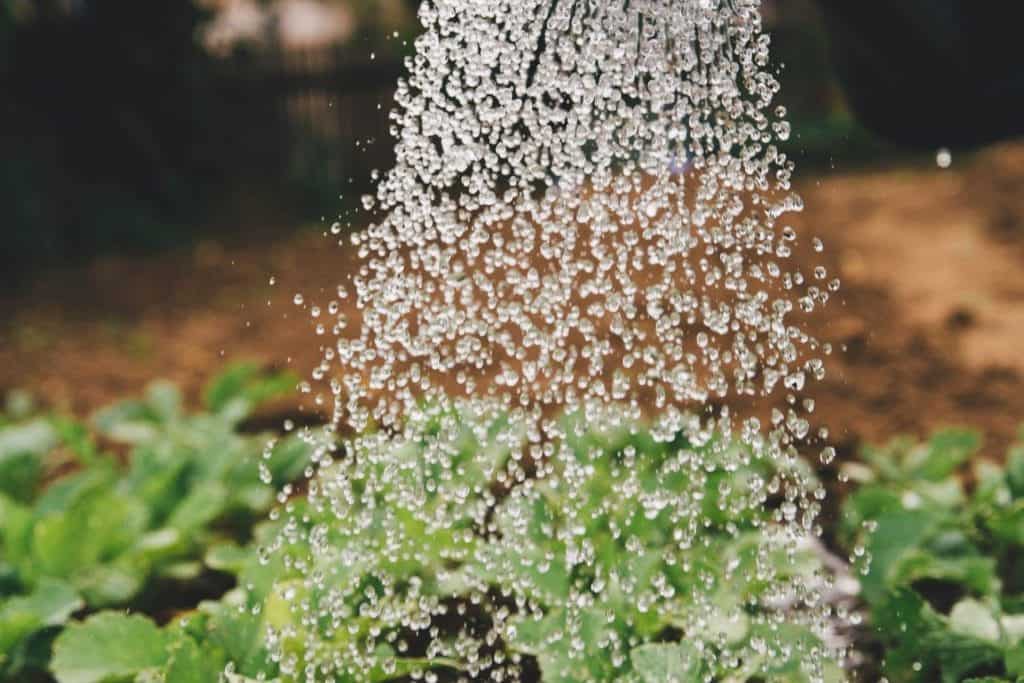
Washington’s abundant rainfall offers a fantastic opportunity for gardeners to become more self-sufficient. Imagine capturing those gallons of water falling on your roof and using them to nourish your plants. DIY rainwater collection systems, often starting with simple rain barrels, can be a practical solution.
By diverting water from your gutter downspout into a water container, you create a supplementary source of water, reducing reliance on municipal water supplies. This approach to Rainwater Management Solutions can also help manage stormwater runoff, contributing to a healthier environment.

Table of Contents
Article Main Points
- Rainwater offers a free and soft water source for your garden.
- DIY systems can start simply with basic rain barrels.
- Washington’s rainfall patterns make collection worthwhile.
- Proper gutter preparation maximizes water capture.
- First flush diverters improve water quality.
- Simple filtration methods protect your plants and system.
- Gravity and pumps allow for easy garden connection.
- Winter preparation prevents system damage.
- Rainwater has uses beyond just watering plants.
Rainwater is Your Garden’s Best Friend (and Your Wallet’s Too!)
Benefits of Rainwater Harvesting in the Pacific Northwest
Consider the sheer volume of gallons of rainwater that cascade from your roof during a typical Washington downpour. Instead of letting all that precious water become stormwater runoff, imagine redirecting it into rain barrels or larger rainwater storage tanks. Capturing this natural resource offers numerous advantages beyond just watering your tomatoes.
For one, rainwater is naturally soft and free of the chemicals often found in municipal water supplies, a treat for your plants. Furthermore, by utilizing a rain water collection system, you lessen the strain on local water resources and potentially lower your water bill. It’s a win-win for your garden and your finances.
Local Rainfall Patterns
The amount of gallons of water you can collect is directly tied to local weather. Western Washington’s generous rainfall provides ample opportunity for harvesting. Even Eastern Washington, with its drier climate, can benefit significantly from capturing every inch of water.
By observing your property’s specific rainfall patterns and the size of your Rainwater Catchment Surface (your roof), you can estimate your potential rainwater storage capacity and plan an appropriately sized system. Knowing when the heaviest rainfall occurs will also help you manage excess rainwater effectively.
Environmental Edge of DIY Rainwater Systems
Washington, while generally water-rich, faces increasing pressures on its groundwater levels and groundwater table due to changing climate patterns. Every gallon of rainwater you collect and use reduces your reliance on these shared resources.
Furthermore, by intercepting stormwater runoff, you help mitigate soil erosion and reduce the amount of pollutants that enter local waterways. Embracing rain collection is a tangible step towards a more sustainable way of gardening and living.
Table: Estimated Water Savings Based on Roof Size and Rainfall (Western Washington)
| Roof Area (Square Feet) | 1 Inch of Rainfall Collected (Gallons) | Average Annual Rainfall (Inches) | Estimated Annual Collection (Gallons) | Annual Savings* |
| 500 | 310 | 36 | 11,160 | $55 – $112 |
| 1000 | 620 | 36 | 22,320 | $111 – $223 |
| 1500 | 930 | 36 | 33,480 | $167 – $335 |
| 2000 | 1240 | 36 | 44,640 | $223 – $446 |
*Based on an estimated water cost of $0.005 – $0.01 per gallon.
Designing Your Dream DIY Rainwater Collection System
Collector, Conveyor, and Container
A basic rain water collection system comprises three main parts.
- First, the Rainwater Catchment Surface, typically your roof, collects the falling rain.
- Second, a conveyor system, usually your existing gutter downspout, channels the water.
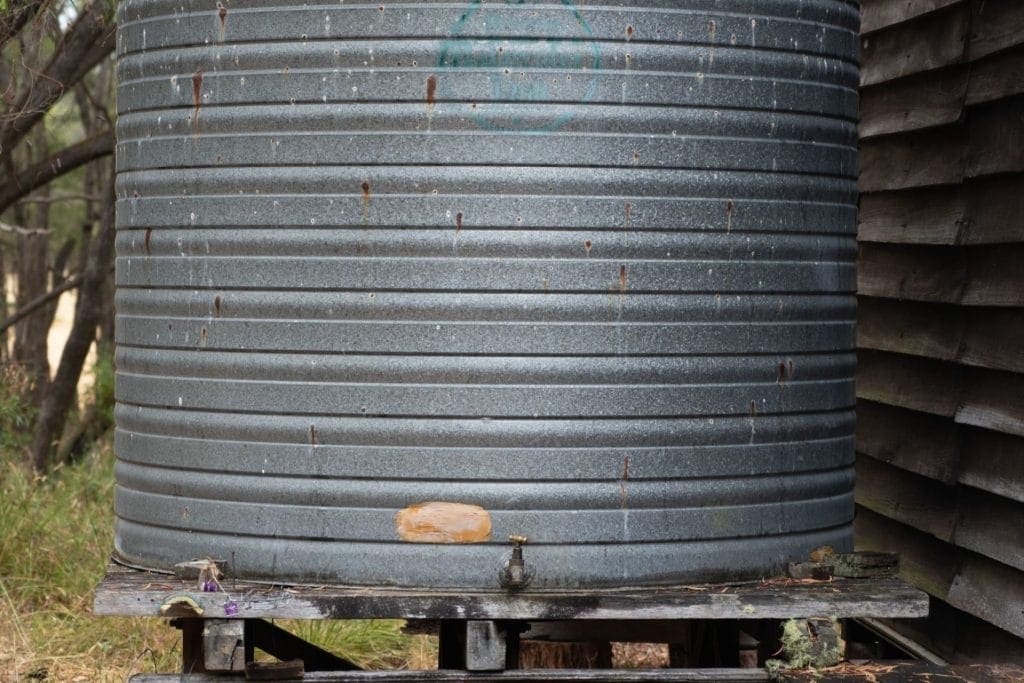
- Finally, a water container, such as rain barrels or larger rainwater storage tanks, holds the harvested water.
For a cost-effective DIY setup, you can often adapt your current gutter system with minimal modifications. The focus is on creating solid and water-tight connections between these components to efficiently move gallons of rainwater to your storage.
Strategies for Maximizing Rainwater Capture from Your Roof
Your gutters play a vital role in directing rainwater from surfaces. Inspect them for any debris that could impede flow. Consider installing an aluminum “gutter-guard or even just a piece of aluminum window screen at the top of your gutter downspout to prevent leaves and other large particles from entering your system.
For optimal collection, position your rain barrels as close as possible to a gutter closest point. You might need a downspout elbow to direct the flow precisely into the inlet hole of your water container.
Choosing the Right Storage for Your Garden
The size of your garden and your watering needs will influence the ideal rainwater storage capacity. A single 55-gallon (or bigger) barrel is a great starting point for smaller gardens, and you can always connect additional barrels later.
Consider using 55-gallon food-grade drums for safety if you plan on using the water for anything beyond purely ornamental plants (though potable water use requires more advanced filtration). Placement is also a factor; a level surface close to your garden will make accessing the stored gallons of water easier. Don’t forget to consider an overflow hole or overflow pipe to manage excess rainwater.
Step-by-Step Guide to a DIY Rainwater Harvesting System
Step 1: Materials You’ll Need
Before starting your rain water collection system project, gather the necessary components.
Table: Materials checklist for a Basic DIY Rainwater Collection System
| Material | Estimated Cost | Notes | Where to Purchase |
| Rain Barrel (55-gallon) | $30 – $80 | Food-grade plastic recommended for better water quality. Consider used options for cost savings. | Online retailers, garden centers, local recycling centers (for repurposed barrels) |
| Gutter Downspout Diverter | $15 – $40 | Choose a type that fits your gutter size and design. Options range from simple to more advanced with shut-off valves. | Hardware stores, online retailers |
| PVC Pipe (for connections) | $5 – $15 (for a few feet) | Size will depend on your diverter and barrel inlet. Schedule 40 PVC is common. | Hardware stores |
| PVC Pipe Adapters/Fittings | $2 – $5 per fitting | Elbows, couplings, etc., to connect pipes at desired angles. | Hardware stores |
| Spigot (Brass or Plastic) | $10 – $25 | Choose a durable option with a standard hose connection (¾-inch GHT). | Hardware stores, garden centers |
| Bulkhead Fitting (for spigot) | $5 – $10 | Creates a watertight seal where the spigot goes through the barrel wall. Size should match your spigot’s thread. | Hardware stores, plumbing supply stores |
| Hose Clamps (if needed) | $2 – $5 (for a pair) | To secure flexible hoses to fittings. | Hardware stores |
| Screen/Coarse Filter | $5 – $10 | Aluminum or fiberglass mesh to place at the barrel inlet and prevent large debris from entering. | Hardware stores |
| Teflon Tape | $1 – $3 | For creating watertight seals on threaded connections. | Hardware stores |
| First Flush Diverter Components (PVC pipe, valves, etc.) | $10 – $30 (depending on design) | To divert the initial dirty runoff. | Hardware stores |
Step 2: Gutter Modifications for Rainwater Harvesting
Your existing gutters are the primary Rainwater Catchment Surface. Begin by thoroughly cleaning your gutters to remove leaves and debris; a roof clean is a good starting point. To direct water into your rain barrels, you’ll need to modify your gutter downspout.
Several diverter options are available, ranging from simple attachments to more involved cuts and fittings. Position your barrel as close to the gutter closest point as feasible.
You may need to cut a piece of gutter and attach a downspout elbow to redirect the flow downwards into the barrel’s inlet hole. Ensure the connection between the gutter and the diverter is solid to prevent leaks. For added protection against debris entering your system, consider installing an aluminum “gutter-guard along the length of your gutters.
Step 3: Set Up Your Rain Barrel(s)
Placement of your rain barrels is a significant consideration. Choose a level and stable location, ideally on well-draining soil or a raised platform made from scrap pressure-treated wood or wood boxing. Elevating the barrels slightly can improve water pressure when using gravity-fed systems.
Drill an inlet hole near the top of the closed-top barrel (or screw-top barrel) that matches the size of your diverter or connecting pipe. Near the bottom, drill a 2-1/2” hole for the bulkhead fitting of your brass spigot or garden hose spigot. Use teflon tape on the threads of the spigot and bulkhead to create a tight seal.
If connecting additional barrels, drill an outlet hole on the side of the first barrel near the bottom and an inlet hole on the second barrel at a similar height. Use PVC pipe and appropriate PVC pipe adapters to link them. An overflow hole or overflow pipe near the top of the last barrel in the series is vital to manage excess rainwater.
Step 4: Install a First Flush Diverter (Optional but Recommended)
The dirtiest water that runs off your roof is the initial runoff, which can contain bird droppings, dust, and other contaminants. A first flush diverter captures this initial amount of water before it enters your main rainwater storage.
Simple DIY designs involve a vertical pipe that fills with the first few gallons of water and then automatically diverts subsequent cleaner water to your rain barrels. You’ll need extra PVC pipe, end caps, and possibly a ball valve for manual draining of the initial runoff.
Step 5: Integrate a Simple Filtration System
Even with a first flush system, some debris can still enter your rainwater storage tanks. A simple coarse filter, such as a piece of aluminum aluminum coarse screen or even the aforementioned aluminum window screen placed at the inlet hole of your barrel, will catch leaves and larger particles.
For finer filtration, consider adding a sediment filter inline before your spigot or hose connection. These filters are relatively inexpensive and can significantly improve the water quality, preventing clogs in your watering system. Regularly inspect and clean your filters to maintain optimal performance.
Step 6: Plumbing for Easy Garden Watering
Once your rain barrels are set up and collecting gallons of rainwater, you’ll want to easily access it for your garden. The brass spigot or garden hose spigot you installed allows for direct connection of a garden hose. Ensure the connection is tight using teflon tape to prevent leaks.
For gravity-fed systems, the water pressure will depend on the water level in the barrel and the height difference between the spigot and your garden. For larger gardens or when greater pressure is needed, consider adding a small submersible pump inside the storage tank.
Step 7: Weatherproof Your Rainwater Collection System
In Washington State, preparing your rain water collection system for winter is essential to prevent damage from freezing temperatures. Empty your rain barrels before the first hard freeze to avoid cracking. Disconnect hoses and ensure all valves are open to allow for expansion. Clean out any accumulated sediment from the bottom of the barrels.
Regularly inspect your gutters for blockages and ensure the overflow pipe is clear. Periodic checks for leaks and ensuring all connections remain solid will prolong the life of your system. Maintenance is elbow grease but well worth the effort.

Common DIY Rainwater System Hiccups and How to Fix Them
Blockages and Simple Solutions
Experiencing reduced water pressure when trying to access the gallons of water in your rain barrels? The most common culprit is a blockage. Check your brass spigot or garden hose spigot for any sediment or debris buildup. Disconnect the hose and try running water directly from the spigot.
If the flow improves, the blockage was likely in the hose. Also, inspect your coarse filter at the inlet hole of your barrel; it may be clogged with leaves or other material. Regularly cleaning this filter will help maintain good flow. Obstructions within the PVC pipe connections are less frequent but can occur; disassembling and flushing the pipes might be necessary.
Algae Alert!
Noticing a greenish tinge in your stored rainwater storage? Algae growth is a common issue, particularly in translucent or light-colored water container options exposed to sunlight. While not typically harmful to plants, it can indicate stagnant water. Prevent algae growth by using dark-colored or opaque barrels and placing them in a shaded location if possible.
Regularly inspect the inside of your barrels. If algae are present, drain the barrel completely and scrub the interior with a stiff brush and a diluted bleach solution (rinse thoroughly before refilling). A closed-top barrel helps to minimize sunlight exposure and reduce algae formation.
Leak Detection and Repair
Discovering leaks in your rain water collection system can be frustrating, as it means losing precious gallons of rainwater. Regularly inspect all connections, especially around the bulkhead fitting of your spigot and any PVC pipe adapters. Small leaks can often be fixed with waterproof duct tape applied to a clean, dry surface.
For more significant leaks at threaded connections, try tightening the fittings, possibly with additional teflon tape to create a tighter tight seal. Cracks in the storage tank itself may require more substantial repair using plastic repair kits available at hardware stores. Addressing leaks promptly will conserve your harvested water and prevent potential water damage to surrounding areas.
Table: DIY Rainwater System Troubleshooting Checklist
| Problem | Possible Cause | Solution |
| Slow water flow | Blocked spigot or filter | Clean the spigot and filter. |
| Water smells bad | Stagnant water, organic matter | Empty and clean the barrel thoroughly. Consider a first flush diverter. |
| Leaks at connections | Loose fittings, damaged threads | Tighten fittings, apply Teflon tape, or replace damaged parts. |
| Mosquitoes in barrel | No tight-fitting lid or screen | Ensure a secure cover and consider mosquito dunks (safe for gardens). |
| Algae growth | Sunlight exposure | Use opaque barrels or place in a shaded area. Clean the barrel regularly. |
| Overflow not working | Blocked overflow pipe | Clear any debris from the overflow outlet. |
Unexpected Ways to Utilize Your DIY Rainwater Collection System
Washing Tools and Boots the Eco-Friendly Way
The soft, untreated nature of collected gallons of rainwater makes it ideal for tasks beyond simply irrigating your plants. Consider using water from your rain barrels to wash garden tools, muddy boots, or even outdoor furniture.
By using this free resource, you reduce your consumption of treated municipal water supplies for these less demanding tasks. Simply connect a hose to your brass spigot and get cleaning. It’s a practical and environmentally conscious way to maintain your outdoor space.
Rainwater for Ponds and Water Features
If you have or are considering adding a pond or other water feature to your garden, your rain water collection system can provide a supplementary source of water. Rainwater’s lack of chlorine and other additives can be beneficial for aquatic life.
However, be certain to check local regulations regarding the use of collected rainwater in water features, as there may be guidelines concerning overflow and potential impacts on local ecosystems.
Increasing Your Property Value with a Sustainable System
As sustainability becomes a greater concern for homebuyers, features that demonstrate eco-consciousness, such as a well-designed rain water collection system with rainwater storage tanks, can be an attractive selling point. It signals a commitment to resource conservation and potentially lower utility costs, making your property stand out.
Is DIY Right for You?
Cost Savings vs. Initial Investment
DIY rain water collection system project offers the prospect of significant long-term savings on your water bill by reducing your reliance on municipal water supplies. The initial investment, however, involves the cost of rain barrels or rainwater storage tanks, PVC pipe, fittings, and filtration components.
DIY construction can substantially lower labor costs compared to professional installation. Evaluate your budget and anticipated water usage to determine the payback period.
DIY Skills Required
Constructing a rain water collection system involves basic plumbing and carpentry skills. You’ll need to be comfortable with measuring, cutting PVC pipe, drilling holes in your gutter downspout and water container, and creating water-tight connections. If you are unfamiliar with these tasks, consider starting with a very simple setup or seeking assistance from a knowledgeable friend.
A poorly installed system can lead to leaks and inefficient water collection, negating the potential benefits. Be realistic about your abilities and don’t hesitate to seek help when needed for a successful outcome.
Regulations and Potential Permits for Rainwater Harvesting
Before installing a rain water collection system in Washington State, it’s important to read any local regulations or permit requirements. Rainwater harvesting is generally encouraged, but some jurisdictions may have guidelines regarding the size of rainwater storage capacity or how excess rainwater is managed to prevent stormwater runoff issues or impacts on groundwater levels.
Take the Quiz
Frequently Asked Questions about DIY Rainwater Collection Systems
1. How big of a rain barrel do I need for my garden’s watering needs?
A general guideline is to estimate your water per week needs during the driest periods and then calculate how much rainwater you can realistically collect from your entire roof based on average rainfall. Starting with a 55-gallon drum and adding additional barrels as needed is a common approach.
2. What prevents my rain barrel from overflowing during heavy Washington rainstorms?
A properly designed system will incorporate an overflow valve or an overflow pipe. This allows excess rainwater to be safely diverted away from your foundation once the barrel is full. The sized hole or pipe should be large enough to handle the flow from your roof during intense rainfall events.
3. Is the rainwater collected from my typical asphalt shingle roof safe for watering my vegetable garden?
Rainwater is generally suitable for watering gardens; however, runoff from asphalt shingles can contain some chemicals. The initial runoff, which can be diverted using a first flush system, tends to have the highest concentration of these substances. Use a coarse filter and a sediment filter can further improve water quality for your peace of mind.
4. Do I need to drill drainage holes or vent holes in my closed-top barrel?
While a closed-top barrel helps prevent mosquito breeding and reduces evaporation, a small vent hole near the top is advisable to allow air to escape as the barrel fills. Drilling drainage holes at the bottom is generally not recommended for collection barrels, as you want to retain the water.
5. Will rainwater collection help with stormwater runoff and soil erosion on my property?
Yes, by capturing rainwater in rain barrels or other storage, you are diverting it from becoming immediate stormwater runoff. This can help reduce the volume of water flowing over impervious surfaces like driveways and patios, thereby lessening soil erosion in your garden and surrounding areas.
Conclusion
The potential of harvesting rainwater in your Washington garden is significant. Take the first step towards a more sustainable and cost-effective watering approach. Consider your unique needs and available space to envision your ideal DIY system. Ready to transform your downpours into a valuable resource?
Book a Free Consultation today to discuss your personalized rainwater harvesting plan!